Add tags to your clients
If you would like to assign a tag like "Good client", "Bad client", etc. to your client, follow these steps:
1.Click on Clients
2.Select the client you would like to add a tag to
 3. Click on Edit Tag
4.Click on the tag you would like to use in the drop-down menu or type the name of it. You can add a maximum of 5 tags per client
5.Click on the checkmark to save. To delete an added label, click on the X preceding the label

These tags will then be visible in the appointment window, as well as on the appointment itself in your schedule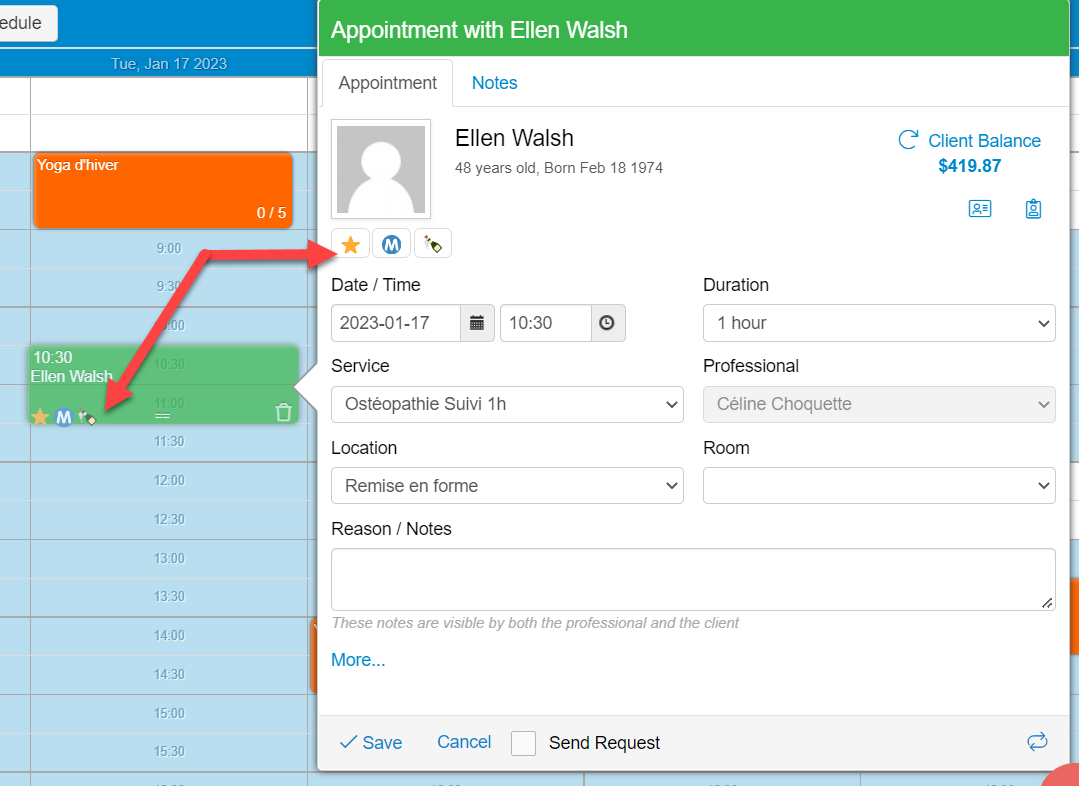

Banned client tag
Prevents a specific client from booking an appointment with you online
If the client logs in at the beginning of the booking process, he/she will not see any availabilities at all
If he/she logs in at the end, the system will recognize him/her as a banned client and they will see the default message saying "Sorry, this is not possible at this time". You can also personnalize this message in Settings / Business / Tags: 


Satisfaction emoticons:
The emoticons with faces "Very disappointed", "Disappointed", "Meh", "tisfied", "Very satisfied" reflect the last review made by the client (if you allowed the sending of the Thank You email). This emoticon is then subject to change through time
You can also add a satisfaction emoticon manually, but keep in mind that it might also change after your client's next review
To change the name or the emoticon associated to the tag, see this article
To apply special actions to your services thanks to tags, see this article