Add Multiple Appointments on the Same Invoice
Here's how to add 2 (or more) appointments on the same invoice:
1. Click on the appointment box in your schedule
2. Select the Billing tab
3. Click on the Invoice button 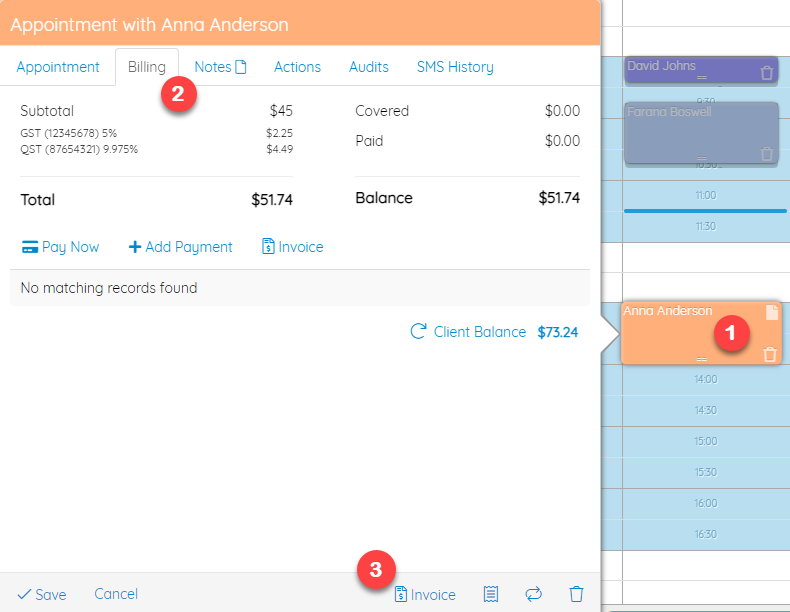

4. Click + Appointment / Class to add a past or future appointment, or a class that has already taken place or not yet 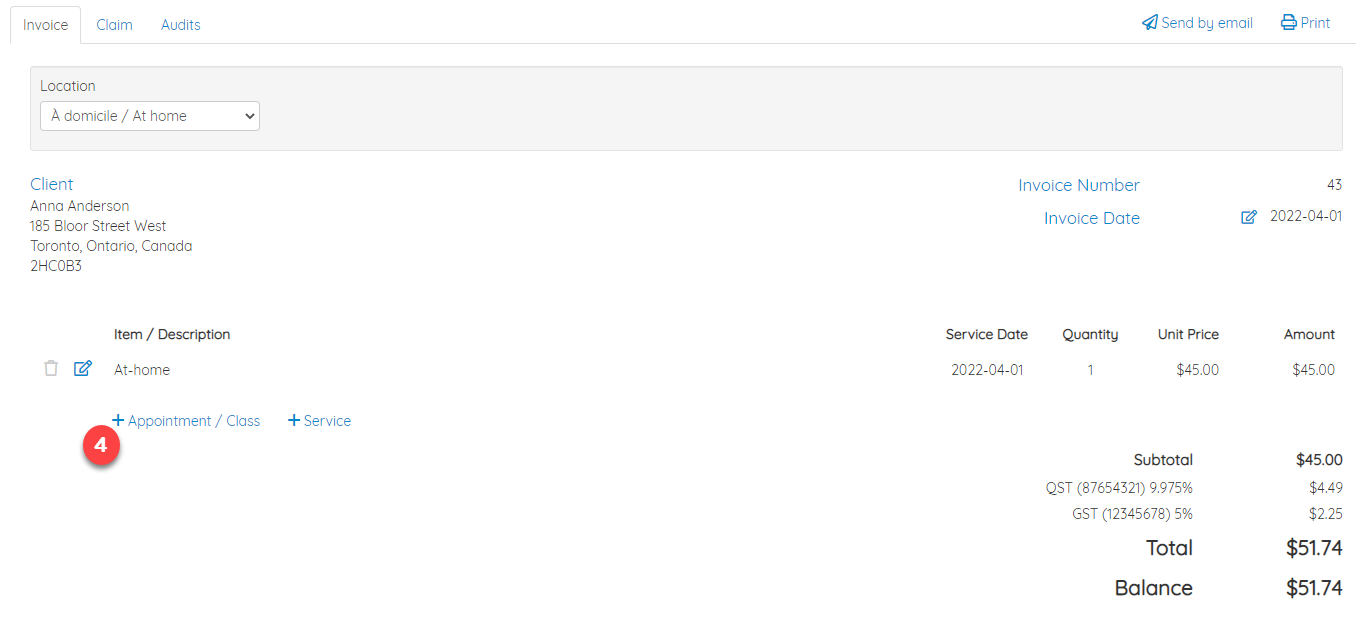

5. Filter the list according to its Appointments or Group Classes, if the sessions are Past or Upcoming and if they are Active and/or Canceled
6. Check the sessions you want to add to this invoice
7. Add 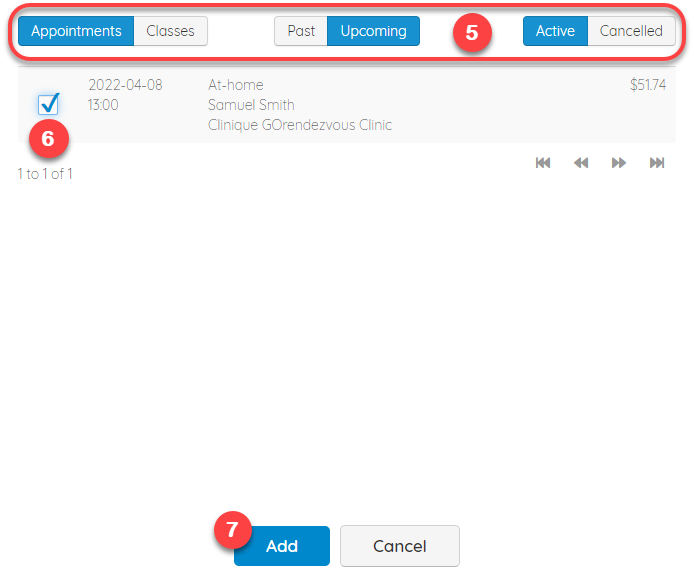

8. Thereafter, make the payment, either by credit card by clicking on the Pay button or on + Payment for any other payment mode 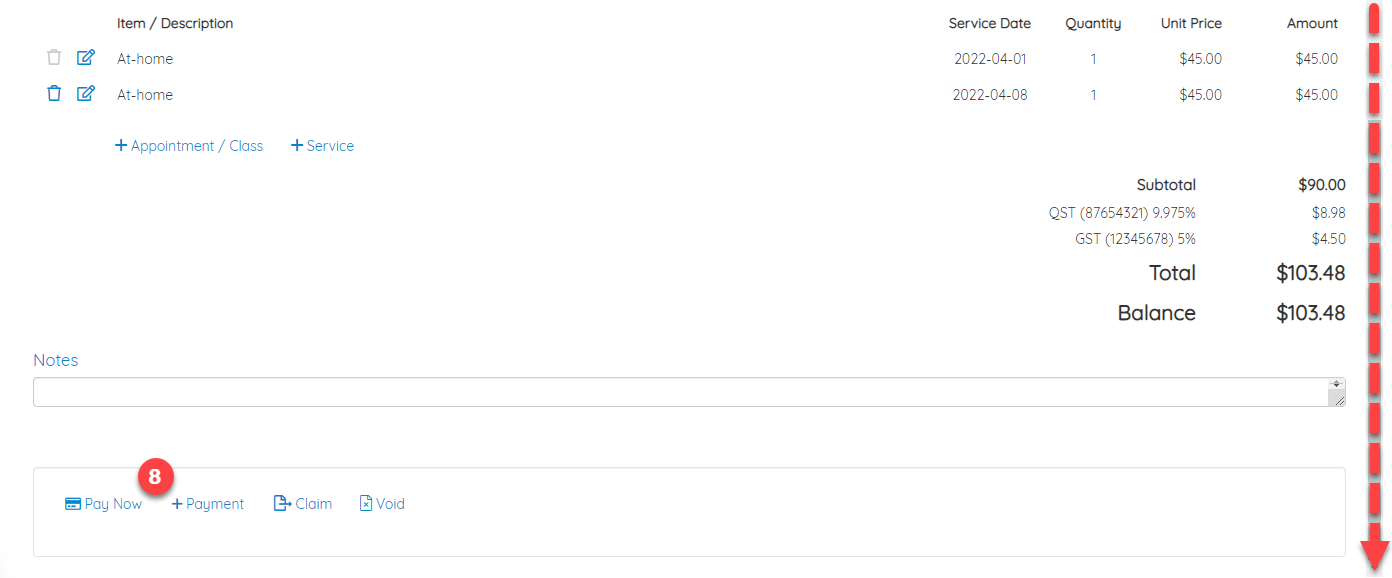

9. You will be asked to confirm the amount (so you can split the amount in half, if two payment methods are used, for example). Continue 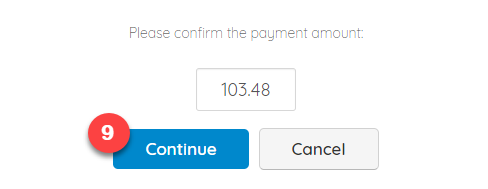

10. All you have to do is Send the invoice by email, or Print it / save it in PDF format 

To add a service / product that is not linked to an appointment (past or future) directly:
First follow steps 1-3 above, then:
4. Click + Service
5. Select the desired service from the drop-down list, then modify the Service Date, Quantity and Unit Price, if necessary
6. Save 
To issue a refund:
- Click x Refund

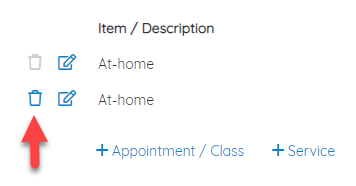
To delete an item on the invoice:
- Click on the trash can icon, to remove the second service that was added. *Note that it is not possible to delete the main service